
How to Deploy a Static Site on DigitalOcean
This guide walks you through deploying a static React site + React-Tooltip library, using DigitalOcean's App Platform. Follow these steps to get your site live quickly and easy!
Examples of Using React-Tooltip
1. Basic Tooltip
This example demonstrates a simple tooltip:
import {Tooltip} from 'react-tooltip';

<a id="my-anchor-element">◕‿‿◕</a>

<Tooltip anchorSelect="#my-anchor-element" content="Hello world!" />
For more examples, check out the React-Tooltip documentation.1. Uploading the project to GitHub
Your project needs to be hosted on GitHub for easy integration with DigitalOcean. Here's how to do it:
- Create a new repository on GitHub and copy the repository URL.
- In your terminal, add the GitHub repository as a remote in your project folder:
git remote add origin https://github.com/your-username/your-repo.git
- Commit any pending changes and push your code to the
mainbranch:git add . git commit -m "Initial commit" git push -u origin main
2. Setting up DigitalOcean App Platform
DigitalOcean App Platform makes it easy to deploy static sites. Follow these steps:
- Log in to your DigitalOcean account or sign up for a new account.

- On the dashboard, click Create and select Apps.
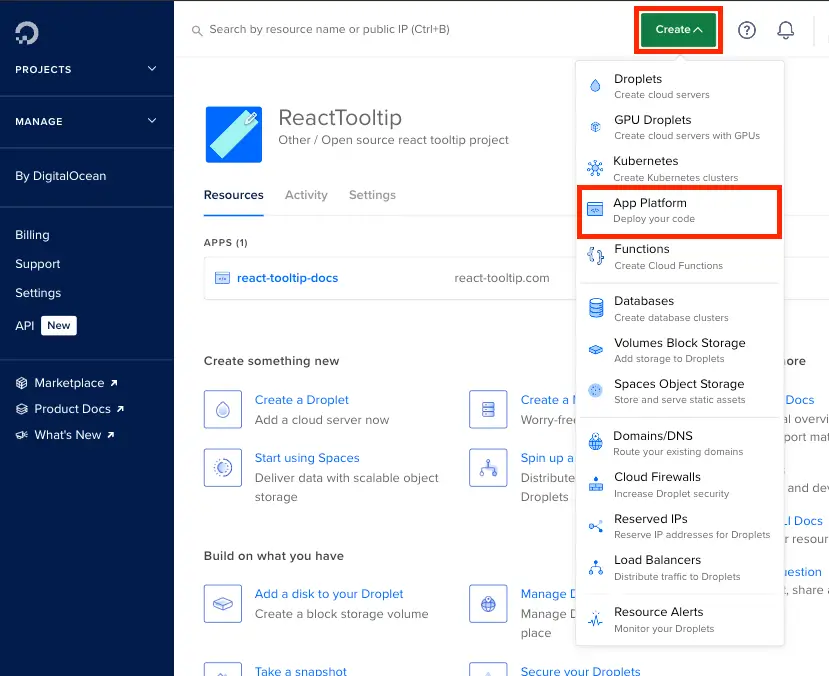
- Connect your GitHub account to DigitalOcean by following the on-screen instructions.
- Select your repository and branch. Usually, the
mainbranch is used for production.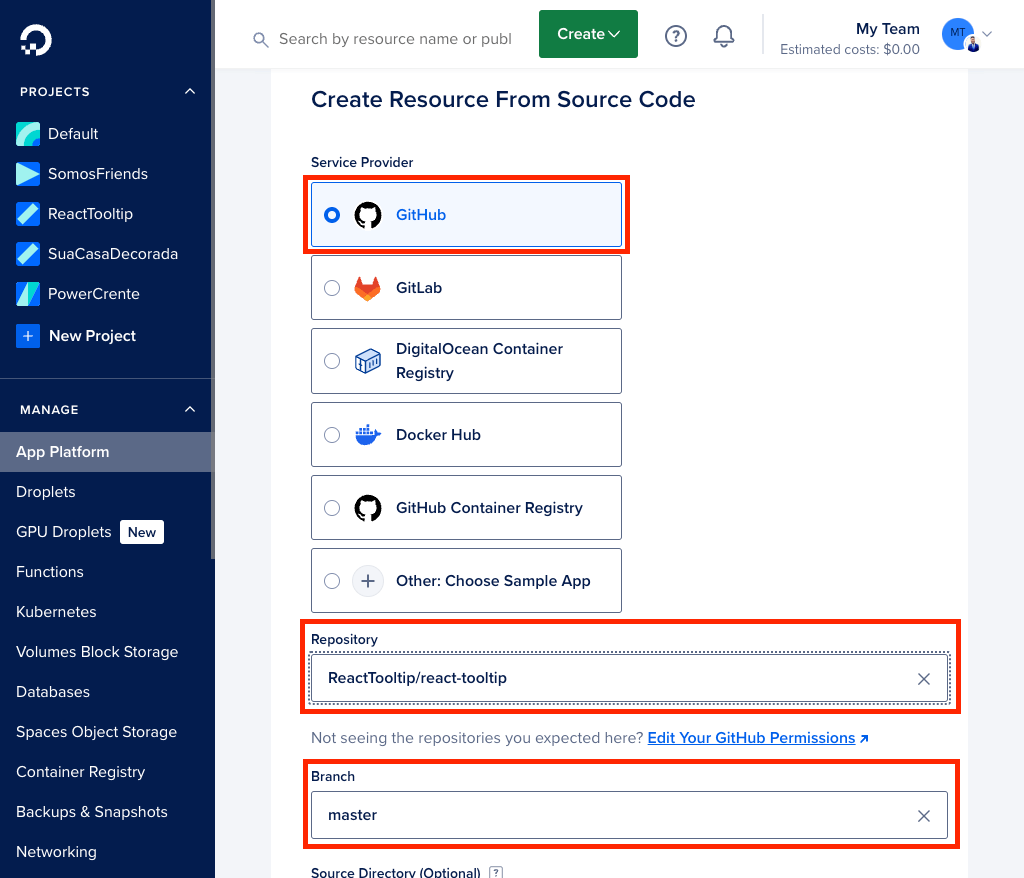
- Specify the build output directory as
build/, which is the default output folder for React projects.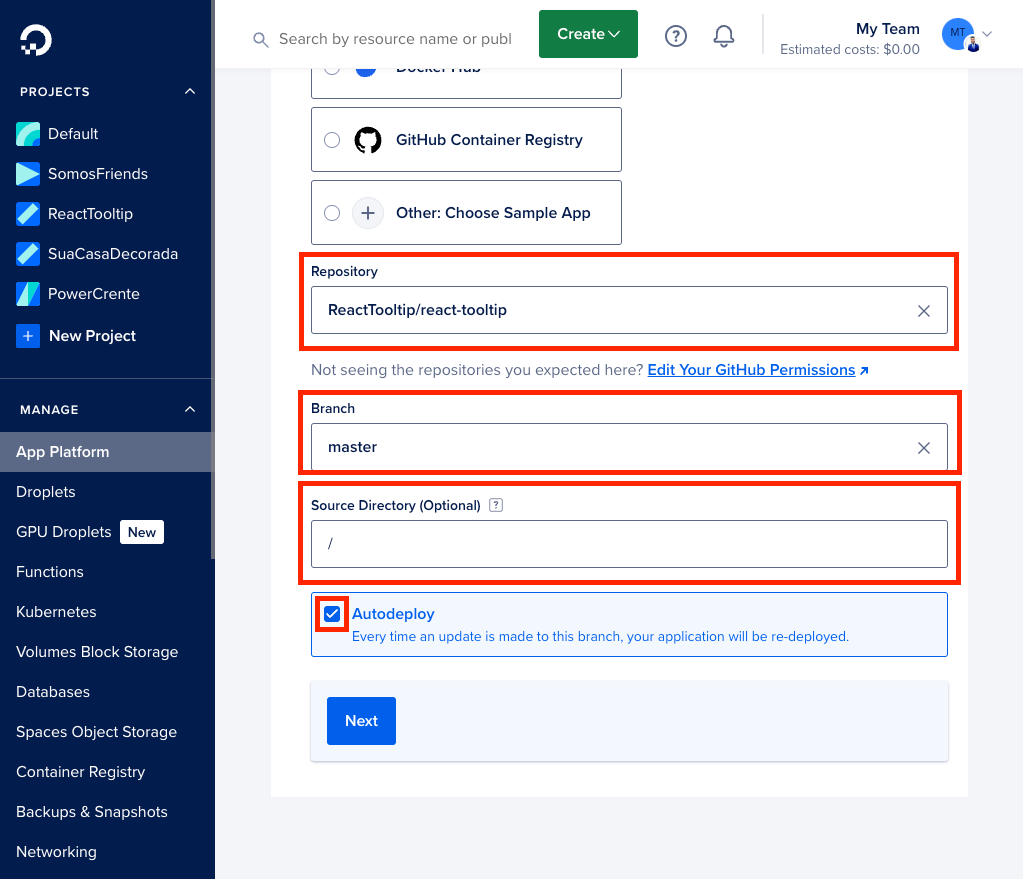
- Choose your deployment plan. You can have up to 3 static sites on free tier.
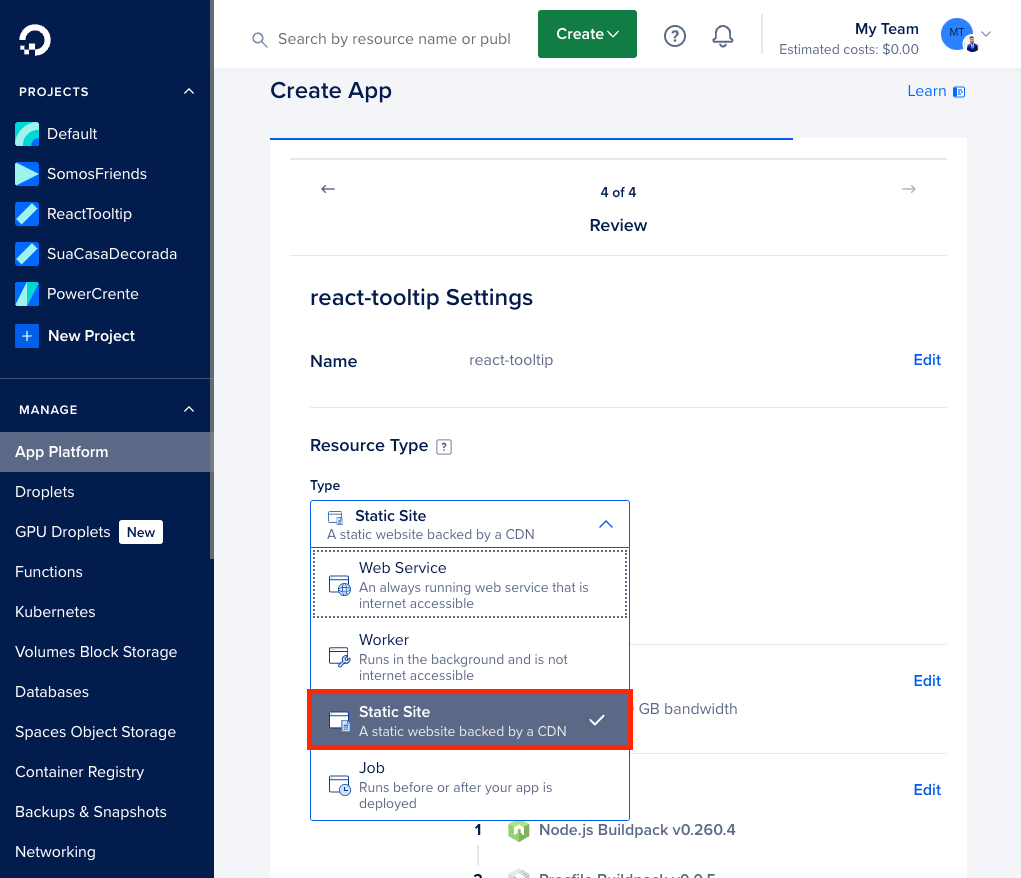
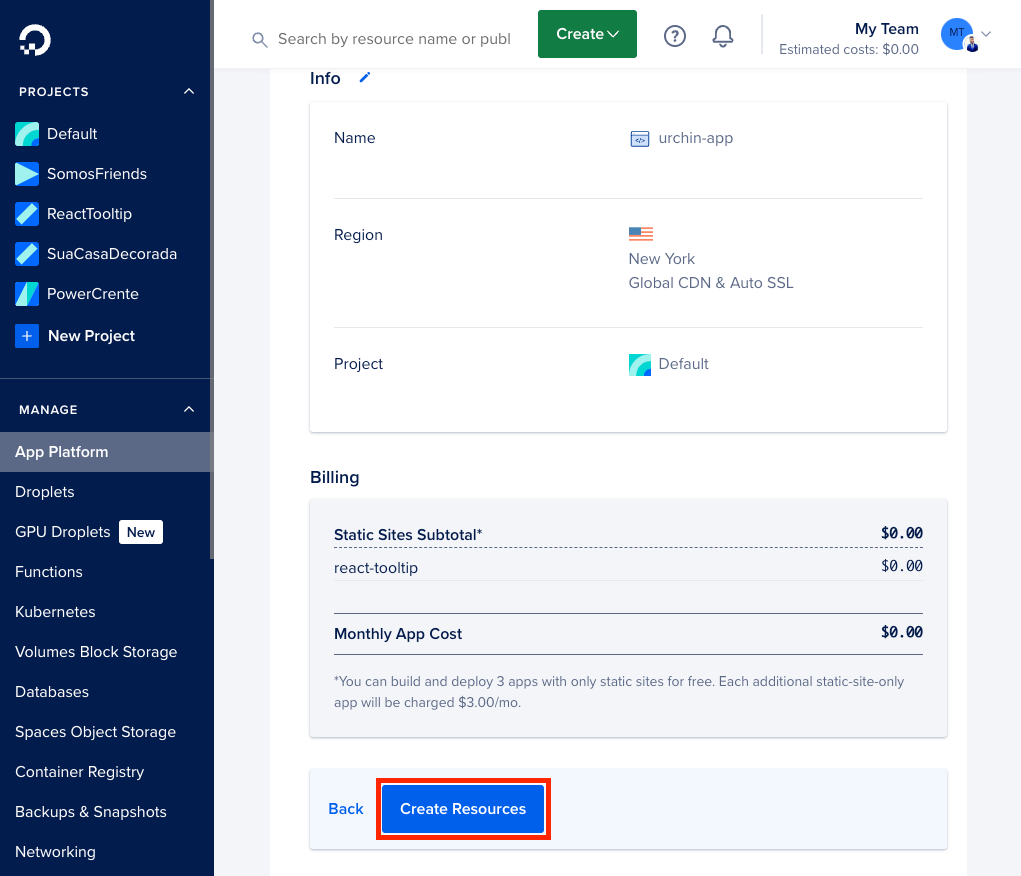
- Click Create Resources and wait for the process to complete.
After the deployment finishes, DigitalOcean will provide a URL for your live site. Visit this URL and enjoy your live site!
Support
If you run into any issues, refer to: